We already covered TrafficJunky tokens in a previous post a few months back. Tokens allow advertisers to track their campaigns more efficiently by populating relevant information in your landing page URL.

How To Add Tokens to Your Landing Page URL
So, how does one add this target URL without being hit with the dreaded 404 error? After creating your campaign in step 1 (Editing Campaign), the next step is to create your ads. On the Ad Specs – Display page you will be prompted to define the ad type and ad name, as well as the target URL for your ads.
Let’s start off with what not to do:
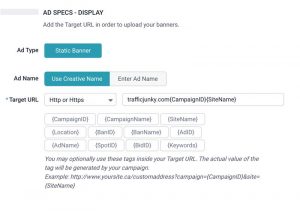 As you can see in the image above, I’ve ignored the example by:
- Not including either http or https in my target URL
- Simply clicking on the tokens I would like to include in my target URL
These common mistakes will lead to the ‘page not found’ error and will more than likely get your campaign rejected.
Here’s the correct way to add your tokens:
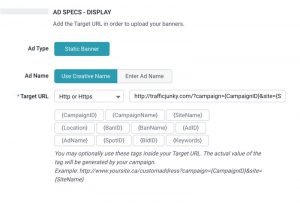
Three things have been added to the target URL:
- The question mark right after the first slash.
- The token description right before the equal sign. Ex: campaignID={CampaignID}
- The ampersands between the different descriptions and tokens.
From there, the dynamic information you have requested to receive from the tokens can be found by clicking on any of your campaigns and hitting the ads tab. The information will be populated in the ‘Target URL’ column.
As always, please don’t hesitate to reach out to our TrafficJunky support team for direct assistance.
